

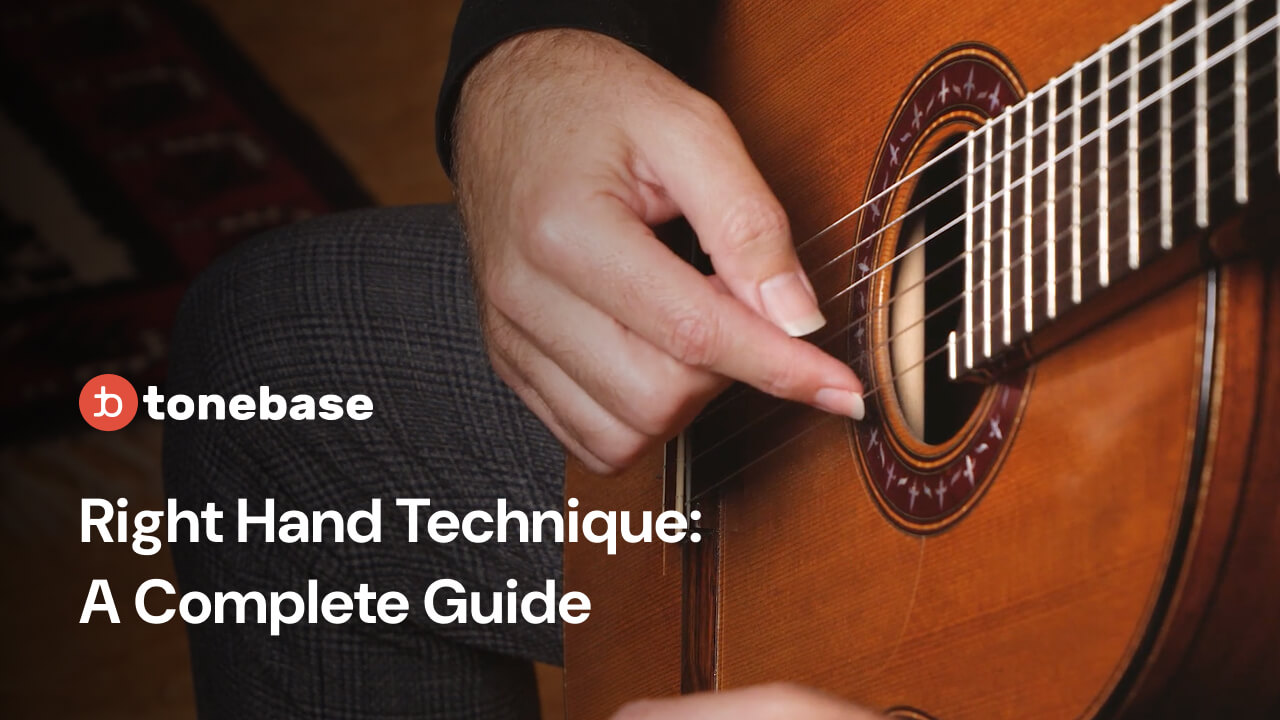
Table of Contents
- The right hand is your voice
- Classical guitar nail shape: the 40/60 rule
- The Bicycle and Diving Board exercises
- The AMI scale system
- The caging principle for precision
- Surface and speed: controlling dynamics
- Daily right-hand practice routine
- Frequently asked questions
1. The right hand is your voice — not a metaphor
Quick answer: The classical guitar right hand produces every note, controls volume, and shapes tone color. Everything it does should be understood as training the musician's "voice" — just as a singer trains theirs. Sound production is therefore the foundation of all technique, not an optional extension.
Aniello Desiderio's On Sound Production opens with a memory from theory class at age seventeen. His textbook defined music in two lines — "music is the art of sound" — and the sentence stayed with him. His entire teaching practice flows from it:
💬 "If the music is a language, it means that it's our voice. And even if you say something really important, really deep, really nice — I think that the kind of voice we use is absolutely important." — Aniello Desiderio
The analogy to speaking is precise. The finest ideas, delivered in a strangled or thin voice, lose most of their power. The same words in a warm, resonant, varied voice communicate far more. Sound production is the training of the musician's voice.
The practical consequence: daily sound-production work is not an optional supplement to technique practice. It is the foundation of all musical development. Players who practice difficult pieces without first developing their sound capacity are building on an unstable base. Marco Tamayo puts the same idea structurally in Essential Principles: the right hand is "the heart of the guitar, the left hand is intellect." Without a good right-hand tone, the left hand's work doesn't matter.
This reframe changes how you practice. Every scale, every arpeggio, every exercise is also a sound-production exercise. If you finish a session without having noticeably improved the beauty of your sound, you wasted part of it.
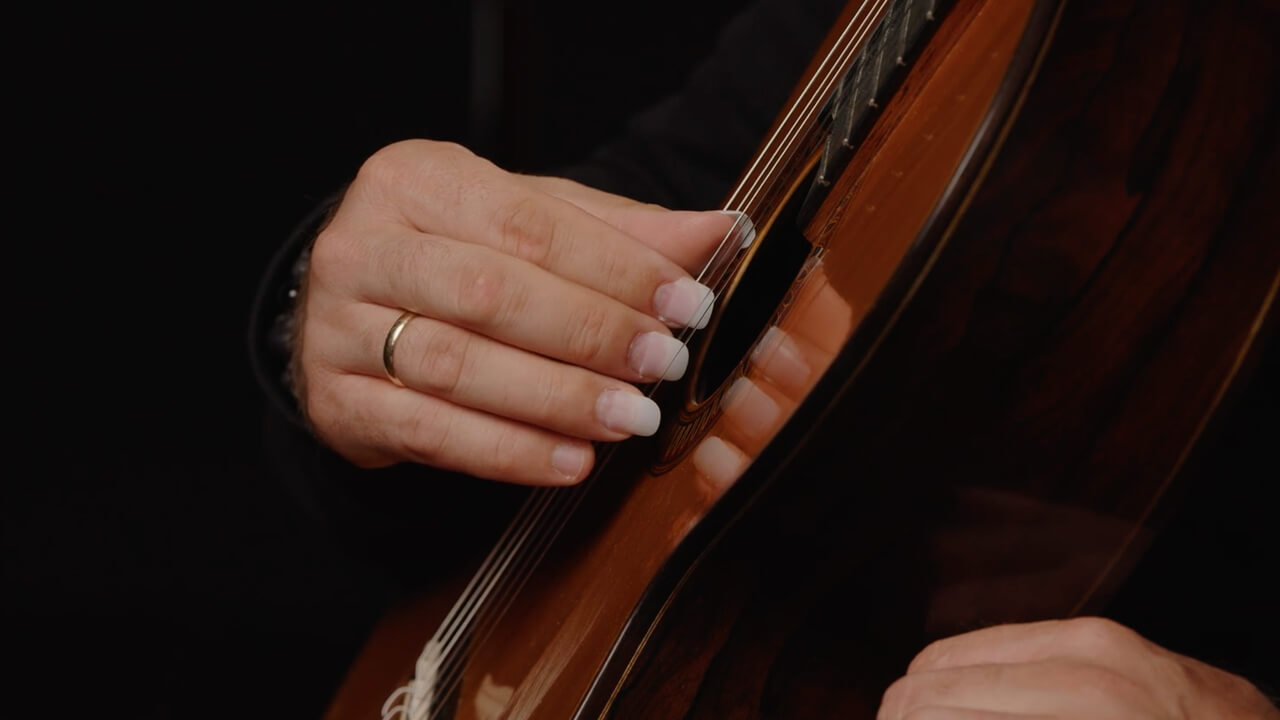
2. Classical guitar nail shape: the 40/60 rule
Quick answer: On classical guitar, approximately 40% of your tone comes from nail shape and quality, and 60% comes from movement and contact. The ideal shape is a polished "half-moon" with a gentle ramp on the attack side, allowing the string to ride up the nail smoothly instead of catching at a blunt edge.
Tamayo quantifies what most players get wrong: tone is roughly 40% nail and 60% technique. The ratio cuts both ways. Players with badly shaped nails will never sound good regardless of technique. Players who blame their nails for every tonal problem are missing the larger variable.
The half-moon shape, as Desiderio teaches it, is a gradual curve that resembles a half-moon when viewed from the playing side. The string travels up the nail surface smoothly, transitioning from flesh contact to nail contact to release — producing a round, full attack.
The filing sequence:
- Shape the overall curve with a medium-grade file.
- Refine the transition point between flesh and nail — the "ramp."
- Polish with fine-grade sandpaper or a polishing block.
The polish is critical. A rough nail surface grips the string momentarily during contact, creating a scratchy tone that no amount of technique can eliminate.
Tamayo's concept of the ramp is particularly clarifying. The nail's attacking edge should be slightly lower than the following edge. The string rides up the nail rather than colliding with a blunt surface. Tamayo contrasts the rounded single-contact stroke (analogous to a violin bow — "sweet," in his word) versus a double-contact catch that creates metallic high-frequency noise. "Metallic" doesn't mean playing near the bridge. It means an uncontrolled dual contact point at the moment of release.
Ali Arango, in On Fast Scales, distinguishes two philosophically different nail shapes: a "classic" nail for round slow playing, and a more beveled picado nail for faster recovery in scale passages. He asks players who struggle with scale speed to examine whether their nail shape is introducing unnecessary resistance.
The takeaway: there is no single correct nail shape. There is the nail shape that produces the sound you want for the repertoire you play. File, refine, polish. Listen. Adjust. Then stop fussing with your nails and practice.
3. The Bicycle and Diving Board exercises
Quick answer: Aniello Desiderio's two core right-hand exercises train the complete stroke motion. The Bicycle builds continuous circular finger motion (instead of jerky stops and starts). The Diving Board trains the follow-through — letting the finger travel through the string rather than stopping at its surface, which produces fuller tone with real body.
Desiderio teaches two core right-hand exercises that, between them, cover the full motion of a clean stroke.
The Bicycle Exercise
The hand moves in a continuous circular motion — from preparation, through stroke, through follow-through, back to preparation — like pedaling a bicycle. The goal is a smooth, even rotation rather than a series of discrete jerks.
How to practice the Bicycle:
- Start on a single string, slow enough to observe each phase: where the finger starts, how it contacts the string, how it passes through, where it ends, how it returns.
- Move string by string, keeping the rotation smooth.
- Gradually accelerate only when the rotation is genuinely smooth at the slower tempo.
What the bicycle exercise trains is the continuity of right-hand motion. Many players' strokes are a sequence of stops and starts: prepare, freeze, stroke, freeze, return. The sound betrays this — each note feels slightly disconnected. A continuous rotation produces a continuous line.
The Diving Board Exercise
The metaphor: a diver at the edge of the diving board, with weight on the edge, then launching. The finger "dives" into and through the string, not stopping at the surface.
This is the single most common right-hand error among intermediate players. They stop their finger at the string. The result is a bright, glassy tone with no depth — the sound of a string plucked rather than a string sung through. A finger that travels through the string, completing its motion, produces a fuller sound with real body behind it.
Desiderio also insists on knuckle position during the stroke: the knuckle of the attacking finger should be parallel to the string at the moment of contact. If the knuckle angles toward the body, the nail-to-string angle shifts and the tone character changes. Consistent knuckle position = consistent tone across all dynamics.
The principle that governs both exercises:
💬 "Slow practice is not just playing the same thing slowly — it is practicing with the same quality of attention you will use in performance." — Aniello Desiderio
4. The AMI scale system — light is fast
Quick answer: The AMI system, developed by Matt Palmer, pairs three right-hand fingers (a, m, i) always moving toward the thumb with a three-note-per-string left-hand scale pattern. This reduces scale playing to a single coordinated gesture — the right hand closes into a fist as the left hand throws weight across the hand — producing fast, even scales with minimal effort.
Matt Palmer's Flawless A-M-I Scales teaches a three-finger right-hand approach (a-ring, m-middle, i-index) always moving toward the thumb, paired with a three-note-per-string left-hand scale system. The combination is "physically easy and mentally easy" because the player learns one motor pattern and repeats it across all strings and positions.
The genius of the system is that it reduces scales to one coordinated gesture. The right hand closing into a fist produces three notes. The left hand throwing weight from the index side to the pinky side produces three notes. The two gestures lock together.
Palmer's central principle:
💬 "Light is fast." — Matt Palmer
Three words that summarize almost everything about right-hand development. Pressure is the enemy of speed.
Key AMI principles
The power stroke. Palmer doesn't use traditional free stroke or rest stroke for AMI scales. Instead he uses what he calls a "power stroke" — between free and rest stroke, with the string pushed toward the soundhole rather than across it. This creates a bigger sound than free stroke while avoiding the string-muting problem of full rest stroke.
One-motion concept. At speed, AMI becomes a single coordinated closing gesture. "Think of this as one thing, just throwing weight from this side of my hand to this side." The entire scale is a series of these throws, each producing a group of three.
Thumb position. The thumb should not be planted on the bass strings while playing scales on treble strings. Planting changes the contour and approach angle of the fingers on every string. The thumb stays close by and trails along near the active strings.
Arm motion is constant. The arm moves continuously while playing AMI scales. The arm travels ahead of the fingers so it's already above the next string group by the time the fingers need to be there. This continuous tracking replaces discrete string-crossing adjustments and keeps the finger approach angle consistent.
Adapting AMI to any scale starting position
Notes on initial stringRight-hand patternThree notesFull AMITwo notesStart with m-i, then AMIOne noteStart with i alone, or with thumbSlur to first noteRight hand starts with i — efficient and smooth
The system adapts to any scale in any key, but only if you've practiced all the common patterns. Palmer recommends learning all seven modes in three-note-per-string format.
5. The caging principle — why tension is a teacher
Quick answer: Łukasz Kuropaczewski's "caging" exercises immobilize adjacent fingers to physically constrain the active fingers into minimum-motion strokes. By training scales and arpeggios with fingers caged in place, students build the habit of tiny, precise movements that persist even when the cage is removed in performance.
Łukasz Kuropaczewski's Guitar Technique Booster includes a set of scale-training methods that at first look sadistic and are actually brilliant. The principle is that fingers trained inside a constraint learn smaller, more controlled movements — and when the constraint is removed in performance, the motion stays minimal as a default.
Method 4: the adjacent-finger cage
The right-hand a finger is placed on the string adjacent to where i and m are playing, acting as a physical constraint that prevents them from lifting away from their strings. The scale is played with i and m alternating, but a is not allowed to move.
Method 5: the full cage
Add the thumb below simultaneously, caging i and m between two planted fingers. "The first and second fingers feel like it's inside the cage," Kuropaczewski says. Both a above and p below are immobilized. Only i and m can move, and only in the smallest possible arc.
The practice is uncomfortable. That's the point.
💬 "Playing guitar is about the smallest and slowest movements possible. Smaller motion = more precise. Close to the string = almost no chance of missing." — Łukasz Kuropaczewski
The geometric argument underlies everything. A finger hovering one millimeter above a string can land with precision because the target is immediately beneath it. A finger lifted three centimeters must travel further, arrive from a steeper angle, and compress the timing into the last fraction of the motion. Caging the outer fingers physically prevents the inner fingers from lifting too high. The movement pattern they learn inside the cage is the movement pattern they keep once the cage is gone.
Kuropaczewski applies the same principle to arpeggios. Method 1 (group preparation) plants all four right-hand fingers before any note sounds. Method 2 (each finger separately) requires each finger to return to its string immediately after playing. Method 3 (finger-by-finger preparation) demands that the next finger be placed the instant the previous one has played — there is never a moment when all fingers are in the air.
The common thread: the hand never has nothing to do. Between notes, it is preparing. A hand that "rests" between notes is a hand that has to re-find its way to the strings for every attack.
{{trip-wire}}
6. Surface and speed — dynamics from inside the stroke
Quick answer: Joaquín Clerch teaches that all dynamics on classical guitar come from two simultaneous variables in every stroke: surface (how much nail contacts the string — more surface means brighter and louder) and speed (how fast the finger moves through it — more speed means more volume). Both dials are continuously adjustable within a single phrase, producing real-time expressive control.
Joaquín Clerch's Cuban Guitar School offers the clearest framework for thinking about dynamics that exists in the tonebase catalog. Dynamics and tone color are not two separate systems. They are two variables controlled simultaneously inside every stroke:
- Surface — how much nail contacts the string. More surface = more resistance = brighter, louder sound. Less surface = warmer, softer.
- Speed — how fast the finger moves through the string. More speed = more volume. Less speed = quieter.
💬 "Surface and speed. How many millimeters of my nail I use to slide through this string. Slide, slide. Not beat the string." — Joaquín Clerch
Both dials are adjustable continuously. A fortissimo chord and a pianissimo melody use the same fingers, the same knuckle mechanics, the same follow-through — with different settings on the surface-and-speed dials. What changes is not which muscles fire but how they fire.
The implication for chords: use the same surface and the same speed across all fingers, or the notes of the chord emerge at different dynamic levels, producing an unwanted arpeggio effect. Conversely, if an arpeggio effect is desired, deliberately varying surface and speed produces it.
Clerch distinguishes two contact modes for the right hand:
- Left-edge contact: approach the string from the side of the nail, creating more resistance and a natural accent-like effect.
- Slide contact: contact the string on the left part of the nail and slide across to the right, producing a warmer, less percussive tone.
The deeper teaching: don't beat the string. Slide through it. Every stroke has a characteristic duration inside it — the time between the finger's first contact and its release. Fast strokes compress that duration. Slow strokes extend it.
7. Daily right-hand practice routine
Quick answer: A complete daily right-hand routine takes 60–75 minutes and covers sound production (Desiderio's Bicycle + Diving Board), scales (Palmer's AMI), precision (Kuropaczewski's caging), and dynamics (Clerch's surface-and-speed studies). The routine ends with applying every element to real repertoire.
The exercises above don't work as a menu. They work as a sequence. Here's how to integrate them.
Step 1: Nail check (1 minute)
Run a finger across each nail tip. Any roughness — polish it now, not later. You can't train a beautiful sound on rough nails, so this comes first, before any exercise that demands tone.
Step 2: Warm-up (5–10 minutes)
Desiderio's Bicycle exercise on a single string, slowly, focused on circularity of motion. Move through all six strings. Then the Diving Board, watching the follow-through of each finger through the string.
Step 3: Kuropaczewski caging (10–15 minutes)
One scale at a time, practiced inside the cage. Method 4 first, Method 5 second. Metronome at 60. Five repetitions per pass, each clean. When both methods feel easy, remove the cage and play the same scale normally — you will notice fingers staying smaller by default.
Step 4: Dynamic studies (10 minutes)
Choose a single phrase from repertoire — a slow melody works best. Play it four times, varying only surface and speed:
- Small surface, slow speed (quietest, darkest).
- Small surface, fast speed (quiet but brighter).
- Large surface, slow speed (fuller but controlled).
- Large surface, fast speed (loudest, brightest).
Notice what changes. Apply the version that serves the phrase best.
Step 5: Apply to repertoire (30+ minutes)
Take everything above into the piece you're currently learning. The routines exist to serve the music. If you spend all your time on exercises and none on music, you have misallocated.
Frequently asked questions
What does PIMA stand for on classical guitar?
PIMA refers to the four right-hand fingers used in classical guitar technique: P (pulgar/thumb), I (índice/index), M (medio/middle), and A (anular/ring). These are the standard finger-indication letters used in scores. The little finger (C for chiquito or E for the English "little") is used rarely.
What is the AMI scale technique?
AMI is a three-finger right-hand scale technique developed by Matt Palmer that uses the ring (a), middle (m), and index (i) fingers in rotation — always moving toward the thumb — paired with a three-note-per-string left-hand fingering. The combination lets scales emerge from a single coordinated motor pattern rather than separate finger alternations, making fast scales physically and mentally simpler.
Should I use rest stroke or free stroke for scales?
Use both, often within the same phrase. Ali Arango's On Fast Scales actively teaches mixing free stroke and rest stroke: free stroke transitioning to rest stroke to build a crescendo, or rest stroke giving way to free stroke to decrescendo into an arpeggio. Arango also distinguishes two types of rest stroke — a classic rest stroke from the air (lyrical, legato) and a picado rest stroke (powerful, staccato). Stroke choice should serve the music, not be locked in universally for fast passages.
How do I stop my right hand from tensing up?
Right-hand tension usually comes from three sources: (1) pressing too hard on strokes — Palmer's "light is fast" principle addresses this directly, (2) planting the thumb on the bass strings while playing treble scales, which fights the natural arm motion, and (3) gripping the guitar body with the forearm instead of letting the arm rest naturally. Practice AMI scales at a slow tempo with deliberate muscle release between phrases.
What's the best nail shape for classical guitar?
The most widely-taught shape is a "half-moon" with a polished ramp on the attack side. Aniello Desiderio recommends filing with a medium-grade file, refining the ramp transition, and polishing to a mirror finish. Players focused on fast scalar playing may prefer a slightly more beveled picado shape for faster string release. There's no single correct shape — experiment within the half-moon family to find what suits your repertoire.
How long should my fingernails be for classical guitar?
Nails should extend roughly 1–2 millimeters past the fingertip — enough to contact the string clearly, but not so long that they become fragile or produce a hollow tone. Aniello Desiderio plays with somewhat longer nails than average, giving a fuller tone; other players prefer shorter nails for precision. Experiment within this range and adjust based on the sound you're producing.
How do I make my scales faster?
Scale speed comes from efficiency, not effort. The three biggest accelerators are (1) Palmer's AMI system with three-note-per-string fingerings, (2) Kuropaczewski's caging exercises to minimize finger-lift distance, and (3) Arango's free-stroke technique at high tempos to eliminate string-adjacent drag. Slow practice at 60 BPM with the Kuropaczewski 5-rep protocol builds lasting speed; fast practice without precision builds sloppy habits.
Why does my right hand feel uneven across strings?
Unevenness across strings usually comes from inconsistent arm position. Palmer teaches that the arm must be in continuous motion during AMI scales — traveling ahead of the fingers so the approach angle stays consistent on every string. A hand that stays locked in position while scales cross strings will produce different tones on each string because the nail contact angle changes. Solution: let the arm move.
Next steps
Back to the hub: Classical Guitar Technique: The Complete Guide
Related deep-dive guides:
- Classical Guitar Left-Hand Technique
- Classical Guitar Slurs: Hammer-Ons and Pull-Offs
- Classical Guitar Stretching Exercises: The Folding Method
- How to Play Fast on Classical Guitar
- Classical Guitar Tone
- Rasgueado for Classical Guitar Made Practical
Learn from the teachers quoted in this article
Every exercise described here is demonstrated in video form by the teacher who developed it. Get unlimited access to Aniello Desiderio's Sound Production course, Matt Palmer's AMI Scales method, Łukasz Kuropaczewski's Technique Booster, Joaquín Clerch's Cuban Guitar School, and 700+ other classical guitar masterclasses.
Start your free tonebase trial →
Sources
- Aniello Desiderio — On Sound Production, Dynamics Masterclass
- Marco Tamayo — On Essential Principles
- Matt Palmer — Flawless A-M-I Scales
- Ali Arango — On Fast Scales
- Łukasz Kuropaczewski — Guitar Technique Booster, Practice Principles
- Joaquín Clerch — The Cuban Guitar School


